New builder needs Help! Posted by vegasvent on Oct 13, 2014
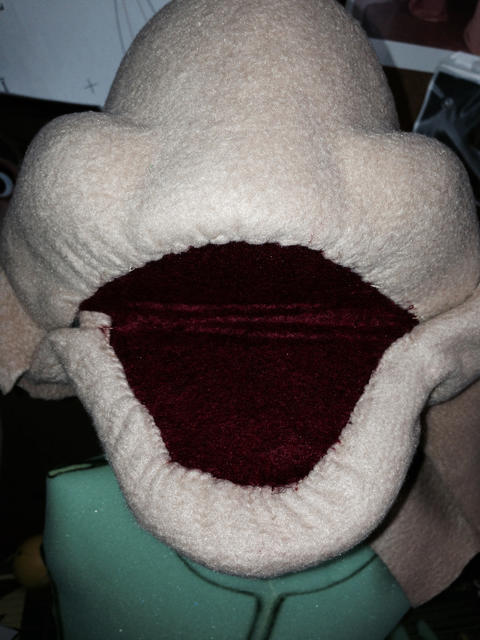
Ok, so I've acquired most materials one would need to create my own Puppets, and set-up my shop. I have patterns in hand as well as lots of ideas. I've actually started building my first puppet last week, but now I am stumped. I've seen the work of many builders both here, and on the internet, and most have these beautifully constructed puppet mouths which end with the skin edge perfectly formed inside the mouth. I have watched tutorial after tutorial, and I've seen no builder show this step on how this was accomplished. Is it sewn in or glued? I've tried hand sewing(see pic below), and it turned out horrendous. Could someone "please" shed some light on how this is correctly done? Thanks in advance!!

Re: New builder needs Help! Posted by The Puppet Workshop on Oct 13, 2014
usually this step is glued for most builds.
Re: New builder needs Help! Posted by Chris Arveson on Oct 14, 2014
This is one of the very few places I use hot melt glue. I start in the middle/front and slowly work my down one side, stretching the fabric to get rid of the wrinkles, then repeat the process on the other side. Not too much glue, or it shows up as a ridge under the fabric.
Re: New builder needs Help! Posted by TygerMin on Oct 14, 2014
I know the Project Puppet suggests sewing, but I also hot glue this part. Not always to the greatest results, but it gets "easier" the more you practice.
Re: New builder needs Help! Posted by Shawn on Oct 14, 2014
I think the trick with gluing or stitching is what Chris mentioned. Start at the middle front and work your way to the corners of the mouth easing the fabric so you get rid of any wrinkles.
Re: New builder needs Help! Posted by Animal31 on Oct 14, 2014
Another thing to check is that the mouth opening is not too large compared to the size of the mouth itself. If the mouth plate is too small, you will unfortunately get the bunching no matter what you do.
Re: New builder needs Help! Posted by ArthurS on Oct 15, 2014
Same here. Hot glue. I try to put it in place without any glue first and try to cut the material as close as I can, then glue. If I miss, I take a sharp craft knife and carefully cut it down to the line I want.
Re: New builder needs Help! Posted by vegasvent on Oct 15, 2014
Great information. This will clear many things up. I'm heading in the right direction now. Many thanks to all of you!! 
Re: New builder needs Help! Posted by jeezbo on Oct 16, 2014
it is a really tricky process ill admit, but you are on the right track as many have said. you can always hot glue or sew the face fabric to the mouthplate and then add In the mouthplate fabric/felt/leather,etc.. after to cover up the wrinkly edge, but it really does get easier with practice and experimentation, I pretty much never have to worry about a wrinkly line or fabric when fixing in the fabric to the mouth and even when I do, its a simple case of camouflaging or trimming the area of concern. you can even create a lip of sorts out of the facial foam where the fabric can tuck under, so that you will ever have to see that wrinkly line. I think you are doing a great job, stick at it and you will see what we mean.
Re: New builder needs Help! Posted by Shawn on Oct 16, 2014
This can be hard if you are not using a pattern but I always try to sew the mouth fabric to the face on machine with wrong sides together and then flip and glue into the mouth plate. Like I said this is easier when you are working with a pattern you have established or purchased but can be done with custom builds. Even if you don't have a machine using this technique with hand sewing is often cleaner then top stitching.
Loading
No More Post
Error
Loading