Making eyes using polymer clay Posted by VampireWombat on Apr 28, 2009
I was asked by ScubaSteve to redo my tutorial for making eyes using pictures. This seemed reasonable since I stumbled over my tongue a few times on the live feed and I'm sure the pictures were hard to see.
Supply list:
* Bolts with nuts. 1/2 inch tall is about right. If you can get washers too, even better.
* Polymer clay - white or off white, the color you want your iris, and optionally black
(Sculpey, Fimo, etc. Avoid Premo unless you use a method to make it less soft)
* A half sphere to use as a mold. A melon baller is what I used, with its hole filled in. Use whatever you can find. You can even make your own mold out of Polymer clay and a sphere or half sphere of the size you want.
* A tube the diameter you want the iris to be. I used a permanent marker lid.
* A tool for cutting excess clay. This can be virtually anything and doesn't even have to be sharp. Dental floss/toothpick tool, plastic knife, etc.
* Something to make a hole the size you want your pupil to be. I simply used the back end of a paintbrush.
* Something for detailing your iris. Water colors water color pencils, thinned acrylic paint, or markers can work. I suggest getting 2 shades of the color you use for iris and a white or a light gray.
* A glossy sealant of some sort. Mod podge, varnish, clear spray paint, etc.
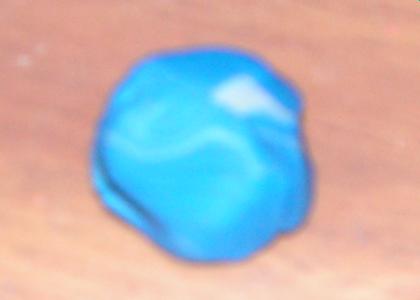
1 - Prepare your clay. This can be merely pinching off the amount of clay you want to use and working it so it will fit in the mold. You may desire to mix colors to make
the iris more lifelike. Or you may mix in some super sculpey to make your supply go further and to make the clay more firm.
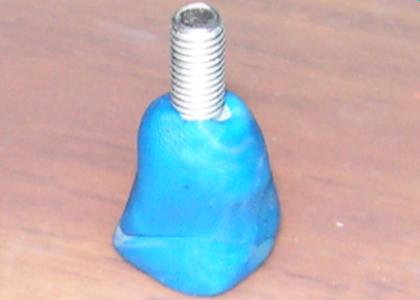
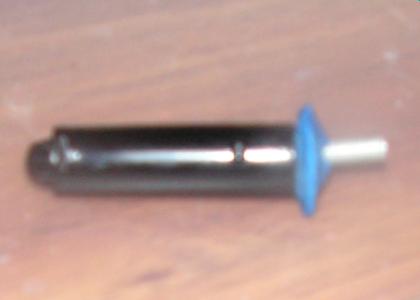
2. Form a column a column with some of the clay and the head of your bolt. Make sure to cover it enough that it won't come out of the clay during use.
3. Either flatten the top of the column on a flat surface or round it in your mold. Place your cyllinder over the clay to shape it.
4. Trim off excess clay and remove it. Make sure to leave some to cover the cyllinder.
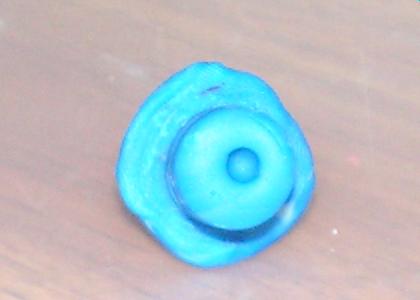
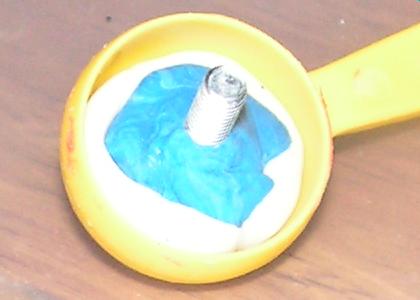
5. Create a lip/ridge by turning down the clay that's over the cyllinder.
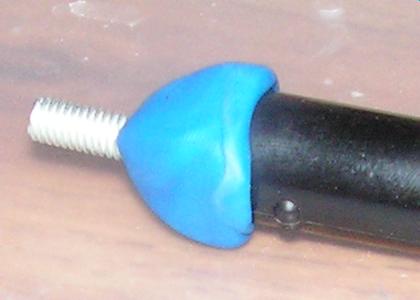
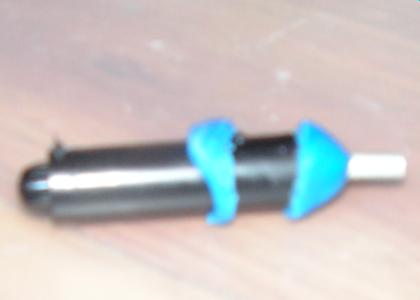
6. Remove cyllinder and create a hole in the center of your clay for your pupil. Bake what you have before moving on to the next step.
Tips: I suggest making several pieces first. Follow the instructions your clay says. With sculpey products I've found that baking for 15 minutes at 265 F works well. Some craft stores sell toaster ovens in the same area as you find the clay. A regular toaster oven will work just as well as long as you can change the temperature as low as 250 F.
A normal oven is fine if you bake clay rarely.
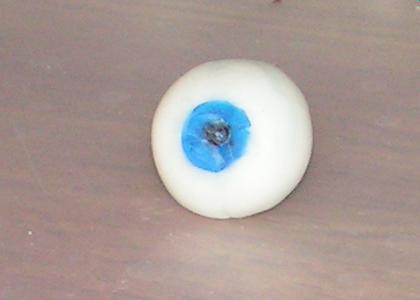
7. Remove your pieces from your oven/toaster oven. Let them cool before handling them. Detail your iris. Study eyes a bit first to get a general idea of how to do it. Use markers, paints, or water color pencils.
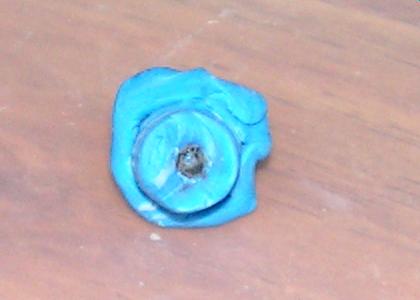
Either paint your pupil or fill the hole with a small bit of black clay. If you do use black clay, make sure to use gloves or wash your hands before moving onto the next step.
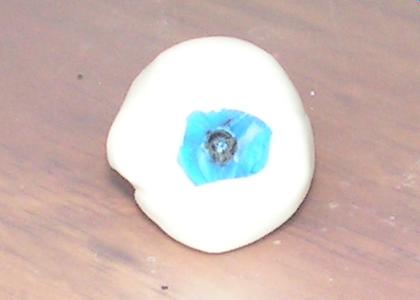
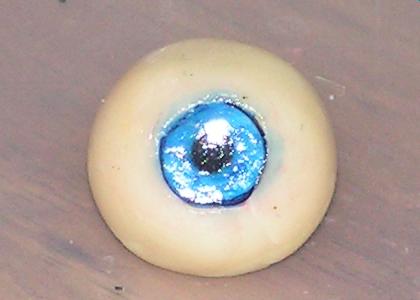
8. Wrap some white clay around the column you've created. Form it to the general shape your eye will be. Use more clay than you need.
9. Place your clay in your mold and work it until it's smooth and has the shape you want.
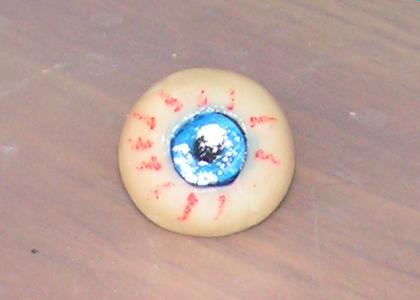
10. Remove from mold and remove excess clay. If any white is covering your iris, use some sort of tool or knife. Try to only handle it by the bolt, or else you will get fingerprints on your eye. Follow the same instructions for baking.
11. Remove your eye(s) and let them cool. If you plan to use thread or yarn for making veins, you glue them onto the eye. Coat with a layer of your chosen finish. Use more coats if desired. If you plan to make veins using water color pencil, then do it over your final layer of finish or else it will run.
Supply list:
* Bolts with nuts. 1/2 inch tall is about right. If you can get washers too, even better.
* Polymer clay - white or off white, the color you want your iris, and optionally black
(Sculpey, Fimo, etc. Avoid Premo unless you use a method to make it less soft)
* A half sphere to use as a mold. A melon baller is what I used, with its hole filled in. Use whatever you can find. You can even make your own mold out of Polymer clay and a sphere or half sphere of the size you want.
* A tube the diameter you want the iris to be. I used a permanent marker lid.
* A tool for cutting excess clay. This can be virtually anything and doesn't even have to be sharp. Dental floss/toothpick tool, plastic knife, etc.
* Something to make a hole the size you want your pupil to be. I simply used the back end of a paintbrush.
* Something for detailing your iris. Water colors water color pencils, thinned acrylic paint, or markers can work. I suggest getting 2 shades of the color you use for iris and a white or a light gray.
* A glossy sealant of some sort. Mod podge, varnish, clear spray paint, etc.
1 - Prepare your clay. This can be merely pinching off the amount of clay you want to use and working it so it will fit in the mold. You may desire to mix colors to make
the iris more lifelike. Or you may mix in some super sculpey to make your supply go further and to make the clay more firm.
2. Form a column a column with some of the clay and the head of your bolt. Make sure to cover it enough that it won't come out of the clay during use.
3. Either flatten the top of the column on a flat surface or round it in your mold. Place your cyllinder over the clay to shape it.
4. Trim off excess clay and remove it. Make sure to leave some to cover the cyllinder.
5. Create a lip/ridge by turning down the clay that's over the cyllinder.
6. Remove cyllinder and create a hole in the center of your clay for your pupil. Bake what you have before moving on to the next step.
Tips: I suggest making several pieces first. Follow the instructions your clay says. With sculpey products I've found that baking for 15 minutes at 265 F works well. Some craft stores sell toaster ovens in the same area as you find the clay. A regular toaster oven will work just as well as long as you can change the temperature as low as 250 F.
A normal oven is fine if you bake clay rarely.
7. Remove your pieces from your oven/toaster oven. Let them cool before handling them. Detail your iris. Study eyes a bit first to get a general idea of how to do it. Use markers, paints, or water color pencils.
Either paint your pupil or fill the hole with a small bit of black clay. If you do use black clay, make sure to use gloves or wash your hands before moving onto the next step.
8. Wrap some white clay around the column you've created. Form it to the general shape your eye will be. Use more clay than you need.
9. Place your clay in your mold and work it until it's smooth and has the shape you want.
10. Remove from mold and remove excess clay. If any white is covering your iris, use some sort of tool or knife. Try to only handle it by the bolt, or else you will get fingerprints on your eye. Follow the same instructions for baking.
11. Remove your eye(s) and let them cool. If you plan to use thread or yarn for making veins, you glue them onto the eye. Coat with a layer of your chosen finish. Use more coats if desired. If you plan to make veins using water color pencil, then do it over your final layer of finish or else it will run.
Re: Making eyes using polymer clay Posted by Sandra on Apr 28, 2009
Awsome supply list. It will be great to review what you explained in the last workshop. Seeing it again in pictures will help me understand a bit more what you were talking about. Not that you were not clear, but as we all know, repetition is key to understanding and memorizing :D
Can't wait to see those pictures!
Can't wait to see those pictures!
Re: Making eyes using polymer clay Posted by VampireWombat on May 01, 2009
Everything is complete as far as I can tell. Please excuse some of the pictures. I still haven't perfected the actual making of the eyes. Just figured out the process. You can get much better results if you take your time.
Re: Making eyes using polymer clay Posted by Sandra on May 01, 2009
Wow, awsome. Maybe you could put numbers on the pictures in future tutorials, that would help a bit more. But awsome work!
Re: Making eyes using polymer clay Posted by VampireWombat on May 01, 2009
I did use numbers. I just didn't use them on the pictures except for the file names. lol
Clicking does tell you which step, though.
Well, it goes from left to right at least. Top row is 1-4, 2nd row is 5-8, and 3rd is 9-12.
I'm horrible at giving instructions.
Clicking does tell you which step, though.
Well, it goes from left to right at least. Top row is 1-4, 2nd row is 5-8, and 3rd is 9-12.
I'm horrible at giving instructions.
Re: Making eyes using polymer clay Posted by Jon on May 01, 2009
Great tutorial VW. Between this posting and the video you posted at Stiqs video blog I have a very good idea how to make eye this way. Thanks.
Re: Making eyes using polymer clay Posted by Sandra on May 01, 2009
Hey Vampire, you did a great job. I guess I am a little too perfectionist at times. You will have to excuse me for that. Great tutorial on blogTV and here!!!
Re: Making eyes using polymer clay Posted by gompie on May 01, 2009
I worked years ago with fimo clay, I booled it in a pan for 10 min. I even booled a head for a marionet with iron pins in his head.....
Re: Making eyes using polymer clay Posted by Billy D. Fuller on May 01, 2009
Excellent tutorial....................... Thank You for updating it with pictures.
Billy D.
Billy D.
Re: Making eyes using polymer clay Posted by Na on May 01, 2009
Thanks for the tutorial! It's really great having it written down somewhere.
Loading
No More Post
Error
Loading