Re: Gryphon Marionette Posted by Abdolos on Jan 03, 2011
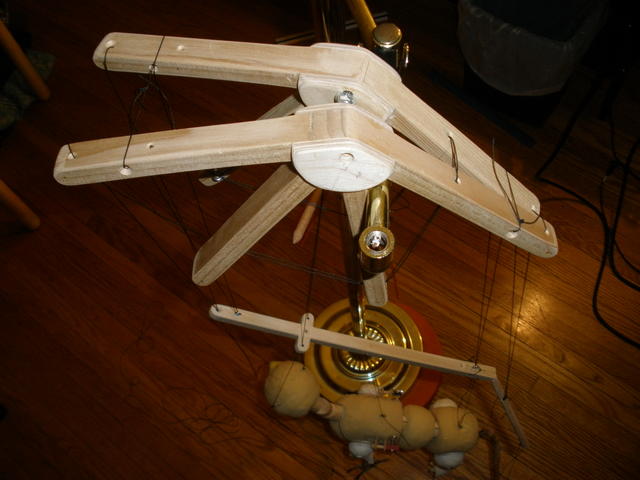
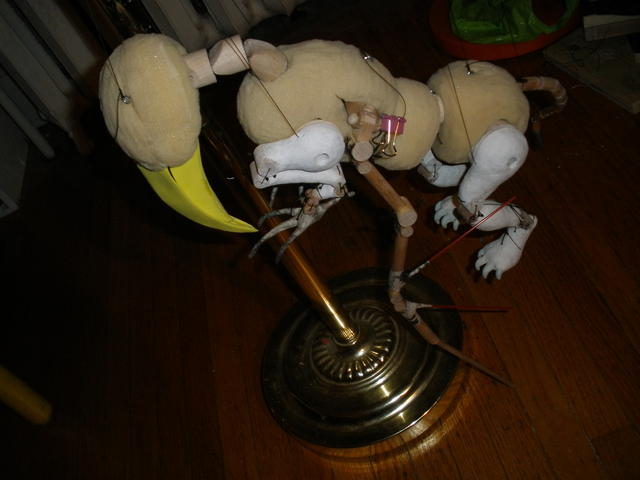
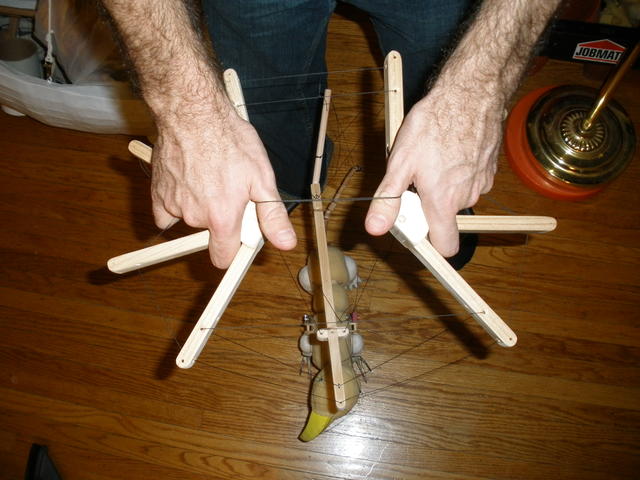
OK, I'm not going to lie: I've been holding out on you. I thought that I was going to start a whole series of posts about building the Gryphon's controller, but things have changed. I received an art grant to build eight human marionettes, and so I've been trying to quickly tie up loose ends on several projects and survive the holiday season at the same time. The result is that I won't really have a lot of time to be working on the gryphon, but I have done some work on the controller. So here are the few pictures that I have to offer for what may be a year into the future:


I hope that these are sufficiently tantalizing. I will probably start a thread on my eight grant marionettes soon, so see you there!
I hope that these are sufficiently tantalizing. I will probably start a thread on my eight grant marionettes soon, so see you there!
Re: Gryphon Marionette Posted by Billy D. Fuller on Jan 04, 2011
Thank You for the update!.......................... glad to see 2011 is starting out good for you. It is always a pleasure to see what you are working on.
Billy D.
Billy D.
Re: Gryphon Marionette Posted by Shawn on Jan 04, 2011
That control looks out of this world! I am a bit disappointed that it will be a year before you can get back to this. :'( I want to see it in action. I looks like it will work great!
Re: Gryphon Marionette Posted by Na on Jan 04, 2011
The controller looks great! Good luck with the grant, I'm excited to see what you make!
Re: Gryphon Marionette Posted by Gui on Jan 08, 2011
Nice work!
Totally new control to me. How does it work?
I can't wait to see it done!
Congrats!
Totally new control to me. How does it work?
I can't wait to see it done!
Congrats!
Re: Gryphon Marionette Posted by amarionette on Jan 10, 2011
As a new one on the forum i will also sit here and wait to see how it works.
Re: Gryphon Marionette Posted by Abdolos on Oct 08, 2011
At the end of last year, I started working in an office at the University of Winnipeg. I took the summer off, but now I'm in a different office at the University. The result is that I have coffee breaks and lunch hours to spend as I wish, so I've been taking little bits of puppet work with me and displaying my strangeness to the world. Hand-sewing is very portable, so I've gotten a lot of work done on the Gryphon's wings. Unfortunately, I haven't taken as many in-progress pictures as I would have liked, so I'll have to describe a little more for this post.
The first wing was an experiment like all firsts, so it has a lot of different cloth pieces sewn together where just a few would have done. I began by cutting a wing-shaped piece of cloth, folding it over the skeleton, and trying to sew it into place:

But I soon realized that the shape I originally chose didn't allow the movements that I wanted, so I cut a piece off and added another.
I cut strips of fabrick and sewed them around the spines:

Then I cut another, smaller piece of fabric to add to the feathery look of the wing and sewed it on:

I sewed many short lines into the feathers to look like feather-spines. Finally I cut the curved edges of the feathers into the larger fabric membrane:


You can see that I've left a lot of raw fabric edges here.
I tried to make the second wing the same as the first, but quickly realized that I would have to make all the original mistakes again to get something similar. So here's my new method: Sew a tube onto the main part of the wing skeleton. Sew the bottom membrane on with the seam allowance turned up. Sew the spine pockets. Sew the top membrane with the seam allowance turned down. This way I conceal all the open fabric edges except those at the ends of the wing where they're supposed to feather. Finally, sew the wing-spine lines onto the wings.
Here's how it's going so far:

Both the wings together:

The Gryphon trying them on for size:

Once the wings are done, I'll get to move to decorating the rest of the body, painting, and so on. Hooray!
The first wing was an experiment like all firsts, so it has a lot of different cloth pieces sewn together where just a few would have done. I began by cutting a wing-shaped piece of cloth, folding it over the skeleton, and trying to sew it into place:
But I soon realized that the shape I originally chose didn't allow the movements that I wanted, so I cut a piece off and added another.
I cut strips of fabrick and sewed them around the spines:
Then I cut another, smaller piece of fabric to add to the feathery look of the wing and sewed it on:
I sewed many short lines into the feathers to look like feather-spines. Finally I cut the curved edges of the feathers into the larger fabric membrane:
You can see that I've left a lot of raw fabric edges here.
I tried to make the second wing the same as the first, but quickly realized that I would have to make all the original mistakes again to get something similar. So here's my new method: Sew a tube onto the main part of the wing skeleton. Sew the bottom membrane on with the seam allowance turned up. Sew the spine pockets. Sew the top membrane with the seam allowance turned down. This way I conceal all the open fabric edges except those at the ends of the wing where they're supposed to feather. Finally, sew the wing-spine lines onto the wings.
Here's how it's going so far:
Both the wings together:
The Gryphon trying them on for size:
Once the wings are done, I'll get to move to decorating the rest of the body, painting, and so on. Hooray!
Re: Gryphon Marionette Posted by Abdolos on Oct 08, 2011
One more thing about my last post; Here are the patterns I used for the wing membranes:


Re: Gryphon Marionette Posted by Shawn on Oct 08, 2011
He is coming along very nicely!
Loading
No More Post
Error
Loading