Re: Advice about cable controls Posted by Billy D. Fuller on May 28, 2010
I hope I'm not spamming/boring everyone with these "info" posts. There's so little information out there about this kind of thing, that I wanted to document what I'm finding as I go, because it might be useful to others later. I like to read such trial and error results, I hope others can find mine useful as well. Smiley
I agree that this can help others and Thank You for sharing your finds. I hope you will take pictures as you build. I'm more of a visual person. Sounds like you have a plan to get you started.
Billy D.
Re: Advice about cable controls Posted by Chris Arveson on May 28, 2010
I'm not bored! This is all new to me, and I am fascinated by how it might expand my puppetry technique. In the words of Oliver Twist, "Please, Sir, I want some more."
Re: Advice about cable controls Posted by Maya Remblai on May 28, 2010
Posted by: Billy D. Fuller on May 28, 2010
I agree and Thank You for sharing your finds. I hope you will take pictures as you build. I'm more of a visual person. Sounds like you have a plan to get you started.
Billy D.
I will. I don't have anything worth taking pictures of at this point, and up until now I was thinking that I might wait until my second project to take pictures, since in the prototype phase I tend to redo things a lot. But I think I will take pictures of my prototyping after all. Later this evening I'm going to work on a prototype armature with the materials I have, and I'll take pictures of that. I don't have a spring suitable for a jaw though, so it will only feature head articulation.
One warning I will give at the start for anyone who wants to try this, is get a cable cutter! All the cables I've seen for sale were at least 48", which is a good foot longer than a shoulder puppet would need, even if the puppeteer is very tall, and restricts the twisting motion. Some are sold noting that you can cut them to size, but even the cheap cables are far too thick for normal wire cutter to manage. My dad has some stronger wire cutters than mine (I only have jewelry cutters, so small that even floral wire is hard on them) but I don't think even those will work on this cable.
Re: Advice about cable controls Posted by Shawn on May 29, 2010
Please do continue to post. You are not spamming at all.  That is what this forum is all about. I learn best by seeing or hearing the process that one has to go through. Even prototypes are great. While it may not be working for you, if you post it then someone else may see a variation that works that you are having a problem visualizing.
Re: Advice about cable controls Posted by Russell2005 on Jun 03, 2010
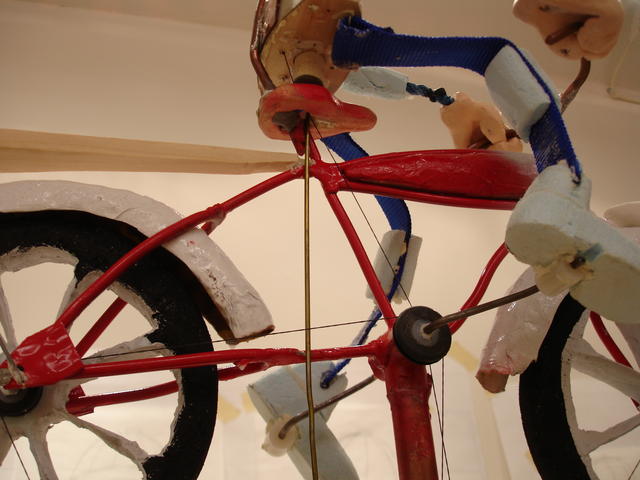
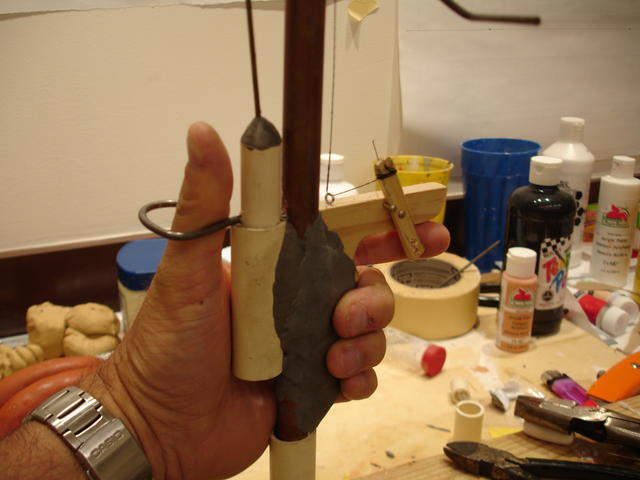
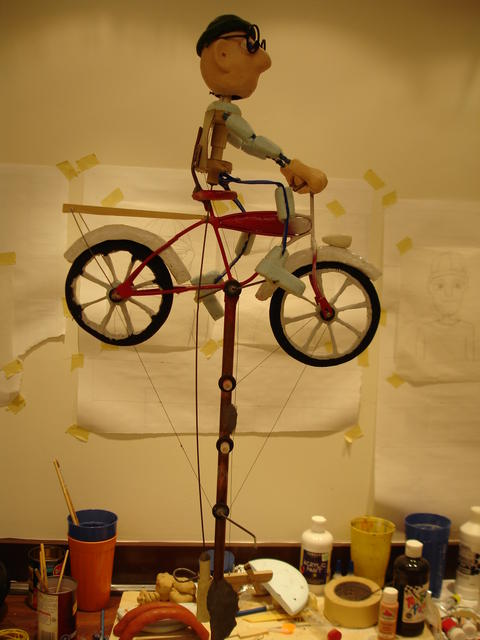
Well I reassembled the bicycle dude only to find that the 3/32 plastic coated cable I had used to control the head began to stretch from all the twisting. I had to go back to the old reliable coat hanger. It's more rigid and provides more torque. I posted some pictures of thew controls in my album gallery. And of course there's tons of stuff at my FB page. Maya be sure to post some pics of that bat creature you're working on. I'm curious to see how that turns out.
Re: Advice about cable controls Posted by Shawn on Jun 04, 2010
I really like that I can see all the details of your mechanics.  It is such a cool set up. One question I have is in regards to the front trigger seen in the close up. I can follow it up to the head but can not tell for sure if you are pulling the back of the head down or the front of the head. I assume spring action brings it back to neutral. I think you might have mentioned the spring already... sorry I get lost in all the post some times.
Re: Advice about cable controls Posted by Russell2005 on Jun 04, 2010
Shawn I used elastic as a "spring" at the back of the head. And black braided fishing line running down to the trigger that pulls the head down. I decided to use epoxy putty to hold the trigger in place. It's a crude setup. But, it works! Epoxy putty is pretty cool stuff.
Re: Advice about cable controls Posted by Maya Remblai on Jun 15, 2010
Just letting you guys know, I haven't forgotten about this thread! I've been experimenting with a bunch of different techniques, seeing what works and what doesn't. It's also been terribly hot here, and our air conditioner quit yesterday (we got it fixed though) so that's slowed me down. I will share some of what I've learned so far, though:
So now what I'm working on is the neck joint. I know it's possible to have fabric in that area, I saw a couple of hand-made puppets that had rigid heads but fabric necks, and one commercial puppet that was entirely fabric. It's possible that my current pattern simply doesn't have enough space in the neck area of the fabric, but it looks more like the fabric itself is interfering. I would buy the commercial puppet I mentioned and see how its mechanics work, but it's $40 and I can't really justify that right now, especially if I was going to take it apart.
Edited to add: It just occurred to me that a way to deal with the joint issue might be to make the head and neck "skin" separate, but lying close to the pieces of the joint. Basically making a fabric covered joint. The split would be visible, but the mechanism wouldn't be and there wouldn't be a need for a lot of bunched up fabric.
- I understand now why the shoulder puppets I've seen mostly have fur around their necks: it's very hard to keep the fabric from interfering with the joint, so it's easier to just have no fabric there. I don't know yet how I'm going to get around that, I really don't want "stuff" on the neck but I'm not sure how to hide the mechanism otherwise. I guess I could put a collar or necklace kind of thing there.
- Bicycle brake cables don't really work that well, they're stiff and don't twist much. Flexible airplane push rods work great, and they're not expensive. I got Du-Bro flexible push rods from a local hobby store. Semi-flex would probably work too. Rigid rods might work for rod puppets.
- I've tried various means of making a joint, and it seems that using a pre-made sphere to make a ball joint would be the best choice. I came pretty close with a weird looking clay ball and stud thing (which I will provide a picture of later) but a true ball joint would probably offer more control and less floppiness.
- A good way to make a plush-type head without having stuffing get in the way of the joint is to make a smaller version of the outer "skin" from felt and mush Crayola Model Magic Fusion into it, and anchor the cable and joint in that. This makes a rigid point for the controls without making the whole head from clay (again, all the hand-made puppets I've seen had soft bodies and rigid heads.) The end result is pretty much the same as making a puppet from foam and covering it with fabric skin, just without having to carve or cut foam. Foam would be too soft anyway.
- Model Magic and Model Magic Fusion are NOT the same thing. Fusion has a slightly different texture, sticks to other objects, and doesn't split or crack when it dries. The regular kind splits and doesn't stick to anything.
So now what I'm working on is the neck joint. I know it's possible to have fabric in that area, I saw a couple of hand-made puppets that had rigid heads but fabric necks, and one commercial puppet that was entirely fabric. It's possible that my current pattern simply doesn't have enough space in the neck area of the fabric, but it looks more like the fabric itself is interfering. I would buy the commercial puppet I mentioned and see how its mechanics work, but it's $40 and I can't really justify that right now, especially if I was going to take it apart.
Edited to add: It just occurred to me that a way to deal with the joint issue might be to make the head and neck "skin" separate, but lying close to the pieces of the joint. Basically making a fabric covered joint. The split would be visible, but the mechanism wouldn't be and there wouldn't be a need for a lot of bunched up fabric.
Re: Advice about cable controls Posted by Maya Remblai on Jun 22, 2010
I'm finally making progress on my puppet, after looking at pics and videos of similar puppets. I put a couple of pics in my gallery, though they don't really look like anything at the moment.  I made a ball joint similar to the one Shawn made in his video, though I used a large wooden bead super glued to a wire instead of a wood man. The cable is a 36" Du-bro flexible airplane pushrod, which cost about $4.60 at the hobby store. The head has a solid core made from felt and Model Magic Fusion. The fabric for the head and body are separate pieces, so there will be a lot of loose fabric for the movement. It moves quite nicely.
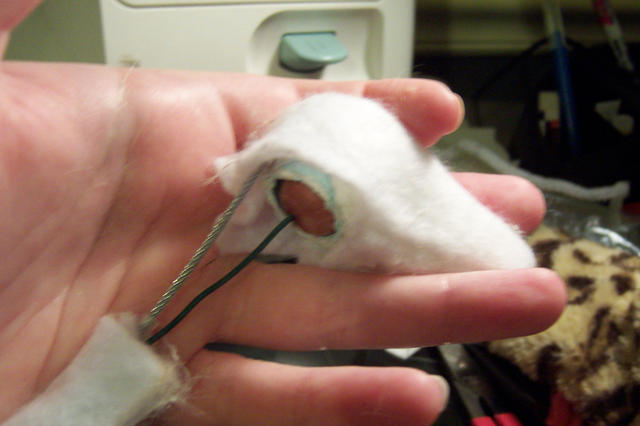
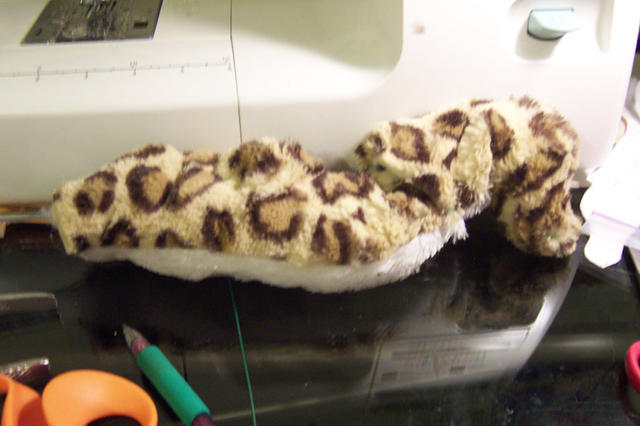
 I made a ball joint similar to the one Shawn made in his video, though I used a large wooden bead super glued to a wire instead of a wood man. The cable is a 36" Du-bro flexible airplane pushrod, which cost about $4.60 at the hobby store. The head has a solid core made from felt and Model Magic Fusion. The fabric for the head and body are separate pieces, so there will be a lot of loose fabric for the movement. It moves quite nicely.

Re: Advice about cable controls Posted by Shawn on Jun 23, 2010
I am soooo syced that you used my method and adapted it! You made my day.
Loading
No More Post
Error
- ← Previous
- 1
- 2
- 3 (current)
- 4
- Next →
Loading