Re: Audrey II Posted by working.lights on Nov 27, 2010
ok just found insert gallery image button so I will try that.
Re: Audrey II Posted by working.lights on Nov 27, 2010
I have now go the basic head constructed so here is the steps and photos:
1) Having made the pattern I cut out two pieces of foam each piece makes half of the head. (If anyone wants a copy of the plan email/message me) Note annotations on foam it is easy to loose track of what is what.
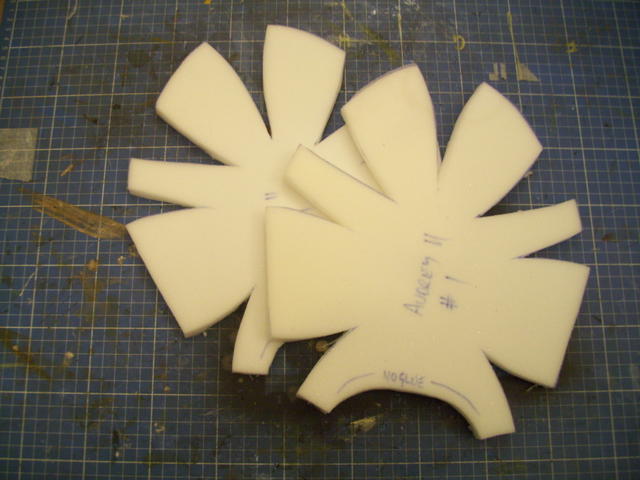
2) I then glued up each half using contact cement and then sat to one side to dry. Once the glue had gone tacky I formed each half into a bowl shape.
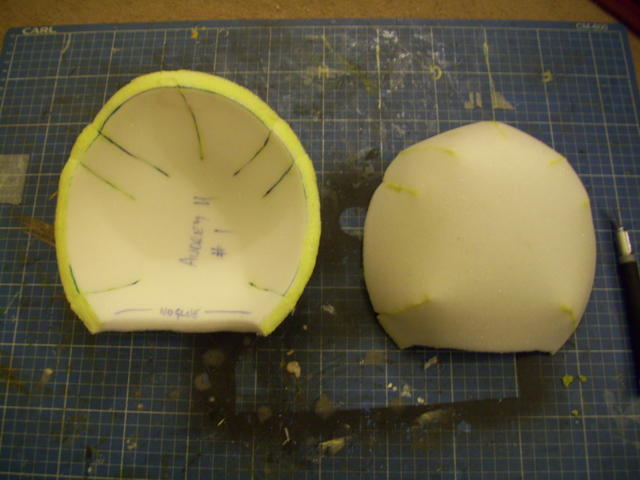
1) Having made the pattern I cut out two pieces of foam each piece makes half of the head. (If anyone wants a copy of the plan email/message me) Note annotations on foam it is easy to loose track of what is what.
2) I then glued up each half using contact cement and then sat to one side to dry. Once the glue had gone tacky I formed each half into a bowl shape.
Re: Audrey II Posted by working.lights on Nov 27, 2010
3) I then glued round the rim of each half and then sat to one side to allow the glue to set once this was achieved each piece was lined up and pressed together to form the head with a hand hole in the base.
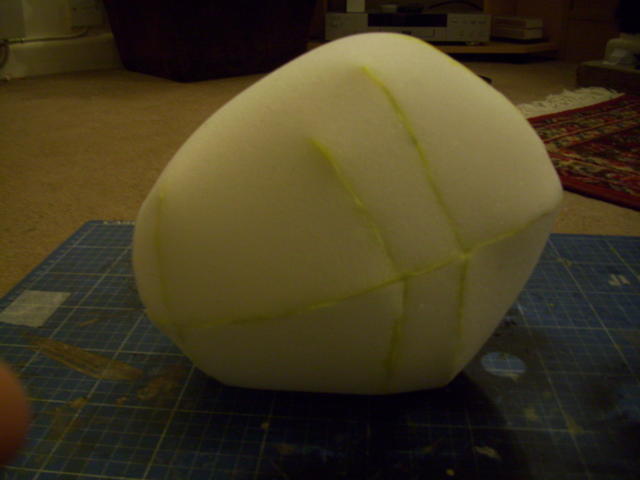
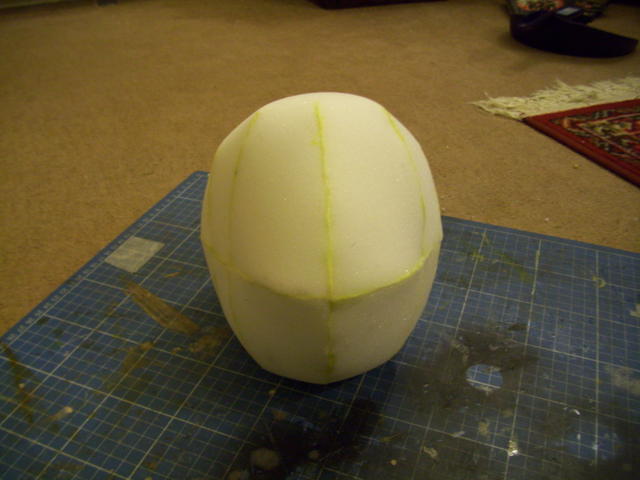
4) Now I needed to decide on the shape of the mouth. so as I got an even mouth I placed a piece of scrap fabric on the head and drew the shape on one half of the head. This was then folded in half and cut out to get a pattern for both sides.
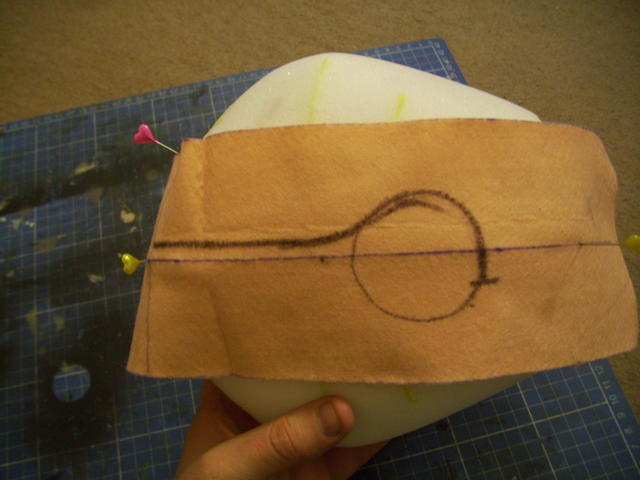
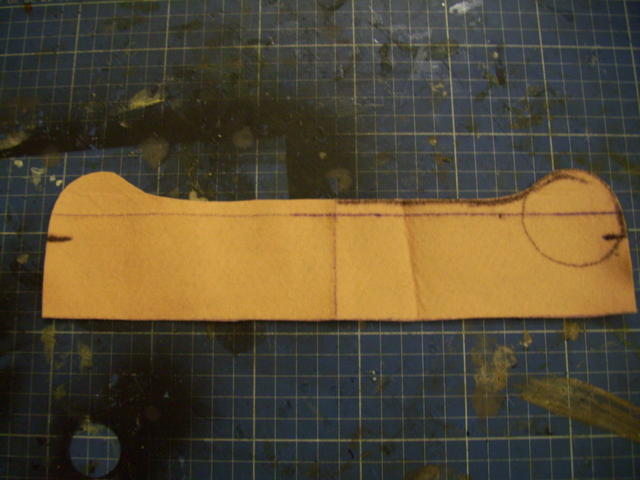
5) Now armed with my trusty mouth stencil I placed it on the head lining up the centre and traced the line onto the head.
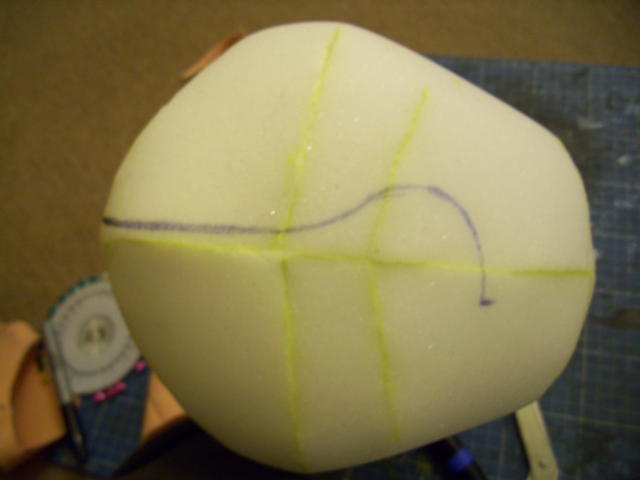
4) Now I needed to decide on the shape of the mouth. so as I got an even mouth I placed a piece of scrap fabric on the head and drew the shape on one half of the head. This was then folded in half and cut out to get a pattern for both sides.
5) Now armed with my trusty mouth stencil I placed it on the head lining up the centre and traced the line onto the head.
Re: Audrey II Posted by working.lights on Nov 27, 2010
6) The moment of truth I take my x-acto knife and begin to cut open the mouth.
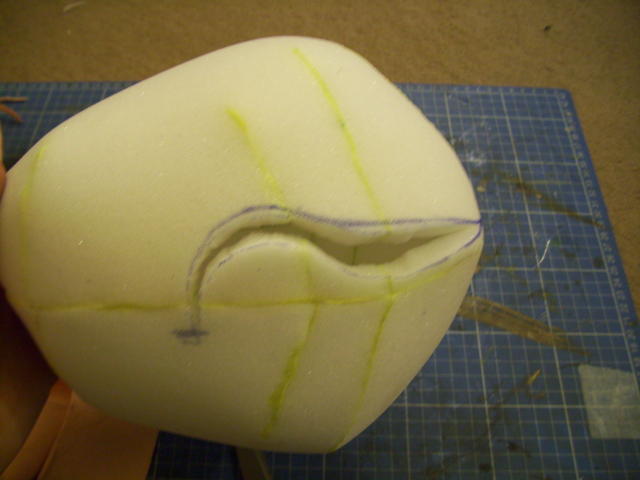
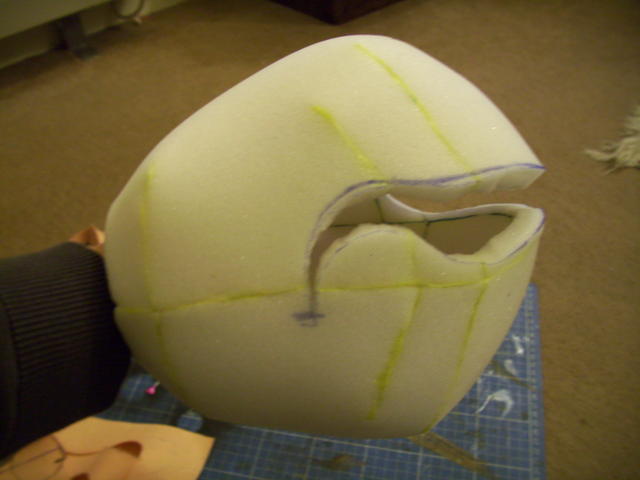
7) Having got the mouth open its time for me to start on the mouth plate. I made a template for a custom mouthplate following a tutorial made by Dr Puppet (http://www.drpuppet.com/doctor_video_tutorial_page.html) (many thanks Jay)
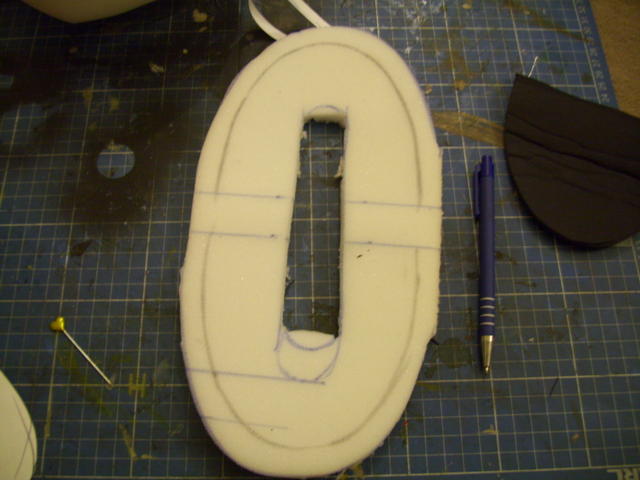
7) Having got the mouth open its time for me to start on the mouth plate. I made a template for a custom mouthplate following a tutorial made by Dr Puppet (http://www.drpuppet.com/doctor_video_tutorial_page.html) (many thanks Jay)
Re: Audrey II Posted by working.lights on Nov 27, 2010
9) These components were then glued together to make the completed mouthplate. In case any of you are wandering what the long hole in the mouthplate is for, it is for my finger to sit as I intend to make a tongue that wiggles.
10) I then glued and fitted the mouthplate into the head following the direction given in Dr Puppets tutorial.
Re: Audrey II Posted by working.lights on Nov 27, 2010
11) This is the finished product after about 3 hours work.
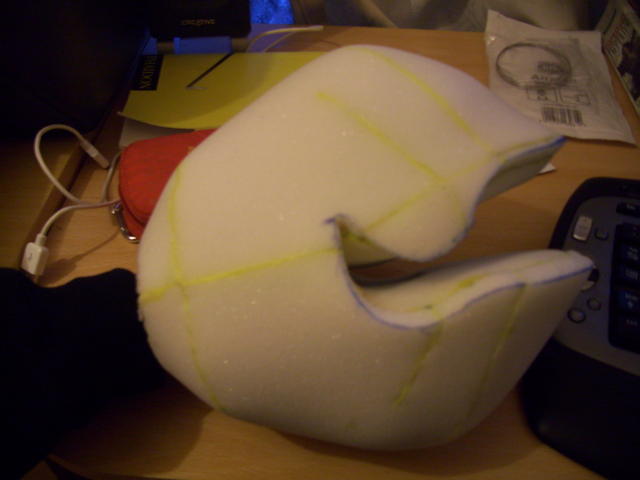
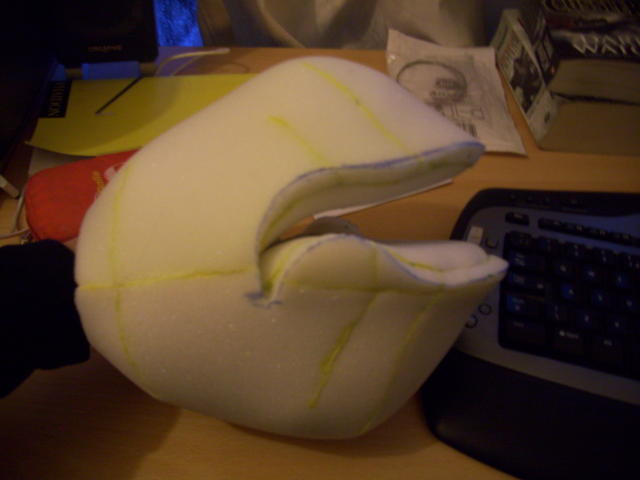
Not sure what way to have the head, mouth upturned or not? I think the upturned mouth is more sinister and inkeeping with the character it also gives a better proportion to the head as the mouth is off centre (deliberately) and makes the top larger than the bottom. What do you guys think?
The next job will be covering the head in fleece I wont document this as again Dr Puppet has a great fleece covering tutorial and I will be following this also he can explain it better than me. (http://www.drpuppet.com/doctor_video_tutorial_page.html)
Once the head is covered I will post some pics of it. If this helps anyone at all then my work here is done.
Tom Powell CRS
Re: Audrey II Posted by Shawn on Nov 28, 2010
Great lead through on the beginning of this project! Thanks!
I agree with you, I think the first image with the mouth turned up at the edges is a better look.
I agree with you, I think the first image with the mouth turned up at the edges is a better look.
Re: Audrey II Posted by working.lights on Nov 28, 2010
Thanks Shawn,
Today I have made the tongue ready to be installed, also because I cut the mouth into the puppet with no hand in the puppet ie. at rest the mouth was closed and to open it it would have required straps inside the haed and the performer would have to force the mouth open rather than close it. When the mouth was open the head was creasing top and bottom due to excess material. I removed a section of foam in both the top and bottom where the creases form. I then re-glued these and now the head does not crease and when at rest the mouth is open. I dont think that this has altered the shape of the head too much, I have photos and will post asap. Then all this ranting will become clearer.
Today I have made the tongue ready to be installed, also because I cut the mouth into the puppet with no hand in the puppet ie. at rest the mouth was closed and to open it it would have required straps inside the haed and the performer would have to force the mouth open rather than close it. When the mouth was open the head was creasing top and bottom due to excess material. I removed a section of foam in both the top and bottom where the creases form. I then re-glued these and now the head does not crease and when at rest the mouth is open. I dont think that this has altered the shape of the head too much, I have photos and will post asap. Then all this ranting will become clearer.
Re: Audrey II Posted by Shawn on Nov 28, 2010
I understand completely what you are talking about.  I thought about mentioning it to you sooner but had the feeling you would catch it. As a rule you want to build your puppet so the mouth is open by default and has to be forced shut. Still want to see the photos. I think it well help others understand. I can tell by what you have done so far that you have quite a bit of knowledge that is going to help you along the way. Trust your instincts.
Re: Audrey II Posted by working.lights on Nov 30, 2010
Here is the image of the crease that forms when the mouth is opened.
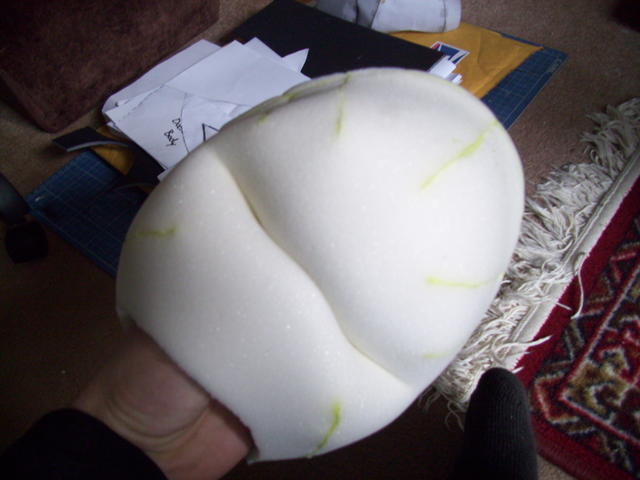
I then marked up and removed a section of foam from the top and bottom of the head.
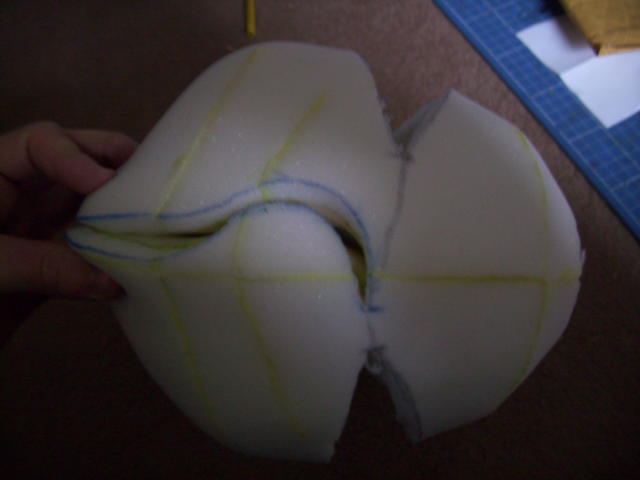
Using contact cement I glued the sides of the cut out together. This gave the advantage of the mouth being opened when no hand inside.
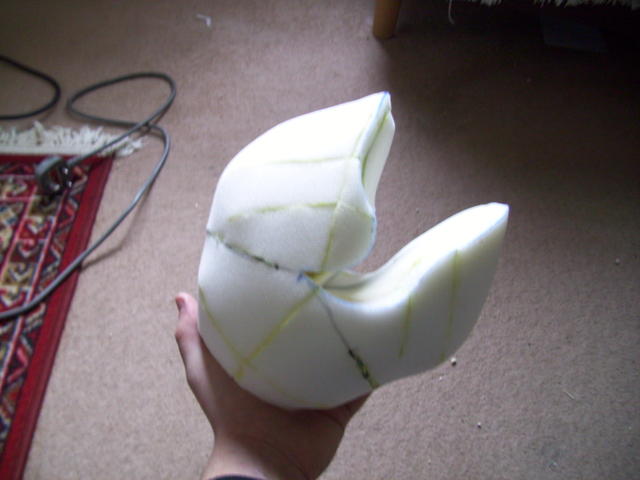
I am happy with the modification as I have opened the mouth, removed the crease and not changed the shape of the head too much.
I then marked up and removed a section of foam from the top and bottom of the head.
Using contact cement I glued the sides of the cut out together. This gave the advantage of the mouth being opened when no hand inside.
I am happy with the modification as I have opened the mouth, removed the crease and not changed the shape of the head too much.
Loading
No More Post
Error
- ← Previous
- 1
- 2
- 3 (current)
- 4
- Next →
Loading