Re: an ill fitting jaw Posted by melaine9 on Nov 20, 2014
It's coming along wonderfully. I really like what your doing.
Re: an ill fitting jaw Posted by Shawn on Nov 21, 2014
You are sooooo on the right track!
Never used chalk before to color a puppet but I have used water down acrylic paint and floral spray paint to color fleece and fabric. Important thing with those is to keep the layer light. If you water the paints down enough you can almost get a dyeing effect where the color is not just sitting on the surface of the fabric but you have to be careful. The fabric absorbs the color and it spreads. I've even used color markers on puppets for accents and details. Again you have to be careful of color spread. I always test on scrap fabric any technique I use.
I think your gathering of the fabric around the mouth should be fine once you apply the details on the inside of your mouth. Did you glue the fabric? Looks like you did. If you did then you can kind of cut down some of the bulk of the gathers before you apply your inside mouth color. I would make the inside of the mouth black by applying a piece of black felt. This lets you get a nice clean line going along the 'lip', then you can glue in tong, teeth etc.
I don't think you'll have any issues with visual noise, but you may be able to test it by filming the fabrics together to see what happens. I think I understand what you mean but newer cameras don't seem to have as much problem with that.
Re: an ill fitting jaw Posted by mkshatto on Nov 21, 2014
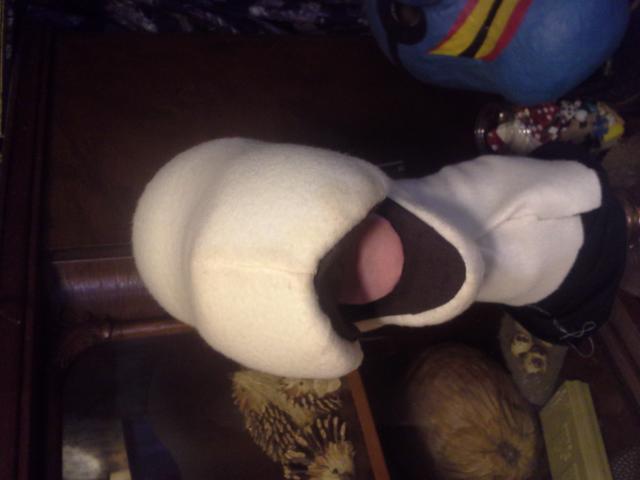
I did glue the white fabric around the mouth onto the rubber mouth plate, with the intention of stitching around the dark mouth lining to come. It turned out alright. I haven't quite finished the stitching but jumped ahead to put in the tongue and see how the speech looks. Pretty good.
I tested some paint and chalk on some fleece stretched around and pinned to the first, smaller foam head. The diluted paint virtually disappeared and bled a lot, as you said. I painted just the nose with acrylic paint straight out of the tube and sprayed it with Triple Thick Crystal Clear Glaze to make it look wet, slightly shiny. The various chalk pastels I have result in much more vivid colors than I expected, while retaining the soft quality of the fleece so I think I will go with them but will probably need to spray them as well. Need to see if I have any matte finish spray.
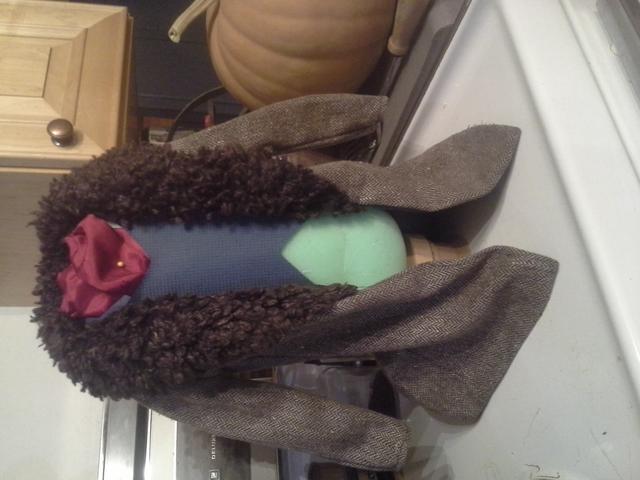
The costume is moving along rather quickly compared to the head. Still making some alterations, but pretty happy. He is becoming a large puppet, especially for me, a short person with short arms, so I have put a hole in the back of the jacket and a false bottom of the front of the foam body, so my arm actually enters the torso nearer half way up. The fabric neck tube attached to the head fits easily down into the torso and the ascot helps to camouflage that the fact that they are separate piece. I feel certain I've done this in a rather clumsy fashion. Seemed to be another mechanical hurdle.
Re: an ill fitting jaw Posted by mkshatto on Nov 21, 2014
Oh! I keep meaning to ask how to prevent my photos from displaying on their sides. Sorry about that. I rotate them in the edit options but they still appear sideways in my posts, which is odd because the originals are not taken sideways...
Re: an ill fitting jaw Posted by Shawn on Nov 22, 2014
Love his costume! No you have not done it in a clumsy way. I've made hand in mouth puppets with the entry from the back instead of the bottom before. Nothing wrong with that.
Re: an ill fitting jaw Posted by Shawn on Nov 22, 2014
Posted by: mkshatto on Nov 21, 2014
Oh! I keep meaning to ask how to prevent my photos from displaying on their sides. Sorry about that. I rotate them in the edit options but they still appear sideways in my posts, which is odd because the originals are not taken sideways...
Not sure what the deal is with them being uploaded on their side. Did you take them with your phone?
The fact that they don't rotate here after you have fixed them in the editor, is something I still need to work out. Part of the code that I've not been able to get sorted out yet.
Re: an ill fitting jaw Posted by mkshatto on Nov 25, 2014
Right now, my phone is my only camera and it's not a great one, but the photos are taken in the correct orientation usually so I don't know why they are rotating. No big deal, though, as it shows the enlargement correctly once I click on the image.
SOOOOOOO, I worked nearly all night Thursday and actually all night on Friday, until 7am Saturday when I needed to get on the road to VA for the comic con and my puppets debut. Well, we did not perform, but it was the big reveal for my friend who commissioned it and our soft launch for the future projects we were promoting. He was pleased, said it completely overshot his expectations, so I was happy. There are a few bits and pieces I will still rework and improve, but for the most part I think it came together well. This, of course, is largely due to all the tips, advice, and feedback I got here from all of you - THANK YOU!!!
So here he is with his nose attached and some coloration.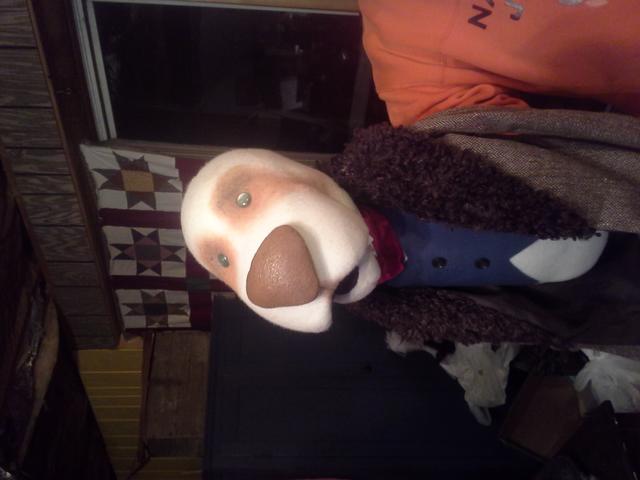
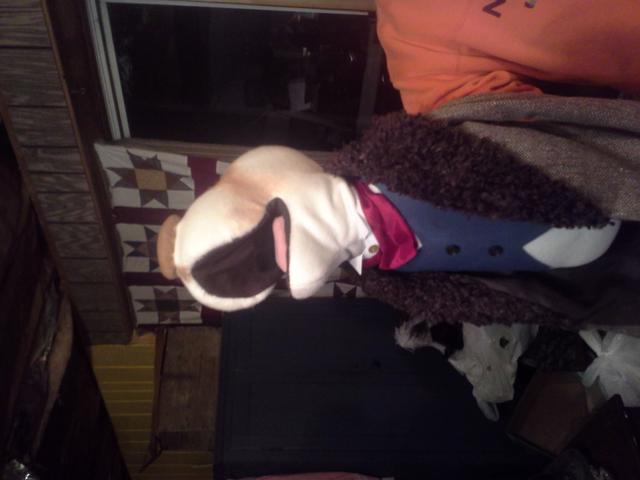 . I found a terrific set of instructions by Three Eyed Willy (Bill Palmer) for making a men's formal collar out of a Clorox bottle. Very easy and great result! http://www.billpalmer.com/collar.htm
I ran out of time to make proper hands and a bowler derby so I threw some together by cutting and painting foam but they will be scrapped. His jacket needed some stitching to lay nicely and stay in place but luckily the fairly heavy weave of the wool herringbone hides all the stitches superbly. I purposefully made the arms skinny, having always been amused by Kermit's gangly limbs flailing about but still planning how to make the hands look well with both skinny arms and a large, substantial head. Need to close the seams on the ears and spray fixative to preserve the coloring on his face but then he's pretty much finished.
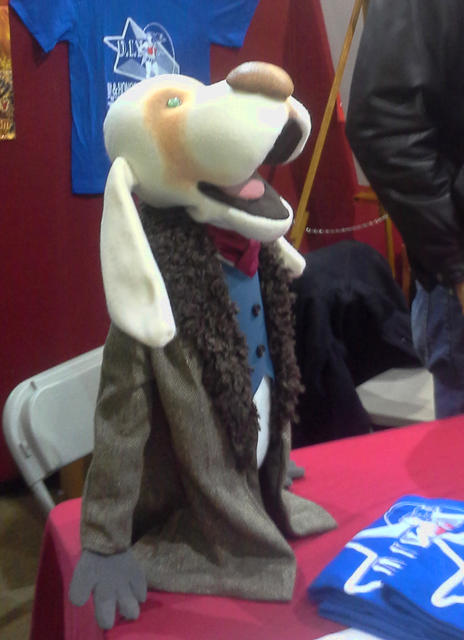
SOOOOOOO, I worked nearly all night Thursday and actually all night on Friday, until 7am Saturday when I needed to get on the road to VA for the comic con and my puppets debut. Well, we did not perform, but it was the big reveal for my friend who commissioned it and our soft launch for the future projects we were promoting. He was pleased, said it completely overshot his expectations, so I was happy. There are a few bits and pieces I will still rework and improve, but for the most part I think it came together well. This, of course, is largely due to all the tips, advice, and feedback I got here from all of you - THANK YOU!!!
So here he is with his nose attached and some coloration.

 . I found a terrific set of instructions by Three Eyed Willy (Bill Palmer) for making a men's formal collar out of a Clorox bottle. Very easy and great result! http://www.billpalmer.com/collar.htm
I ran out of time to make proper hands and a bowler derby so I threw some together by cutting and painting foam but they will be scrapped. His jacket needed some stitching to lay nicely and stay in place but luckily the fairly heavy weave of the wool herringbone hides all the stitches superbly. I purposefully made the arms skinny, having always been amused by Kermit's gangly limbs flailing about but still planning how to make the hands look well with both skinny arms and a large, substantial head. Need to close the seams on the ears and spray fixative to preserve the coloring on his face but then he's pretty much finished.

Re: an ill fitting jaw Posted by Chris Arveson on Nov 25, 2014
He's gorgeous, and I wish I owned that coat! Well, one in my size, anyway.
Re: an ill fitting jaw Posted by Na on Nov 25, 2014
Wow, that's a great looking dog! Love the brown patches
Re: an ill fitting jaw Posted by Shawn on Nov 26, 2014
Man.... I mean Woman you did great! (So anyone get that play on words?)
Really like his head and muzzle shape. Wonderful costuming on him. Thanks for the link on the collar. Seen collars like that before but never thought of making one out of a plastic bottle.
Interesting choice for the eyes. I think I might of put a piece of white and then black felt behind them to help them pop a bit more. They may show better in person though. I love the color of the eye.
Loading
No More Post
Error
Loading