Re: an ill fitting jaw Posted by mkshatto on Nov 17, 2014
The rebuild of the head is going well. I've enlarged it by 10% which seems good - more visible but still manageable.
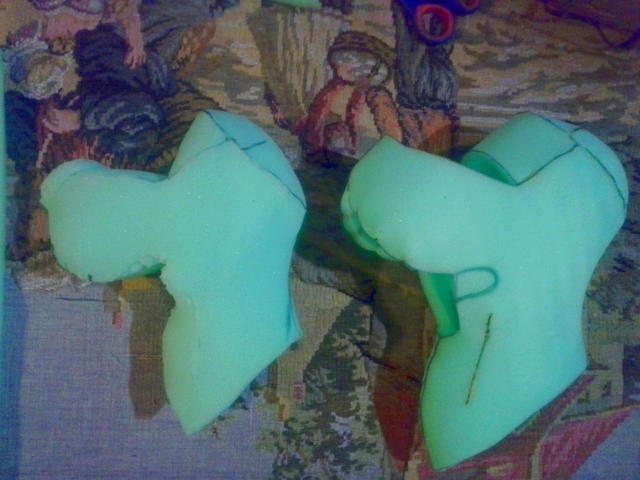
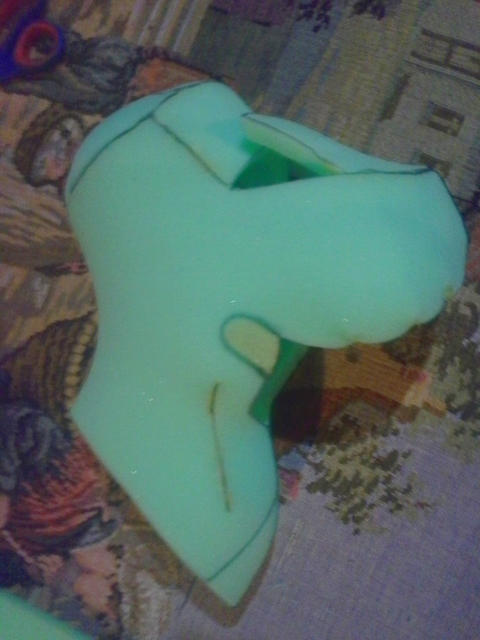
By using the pattern I made the first time around, I achieved a very symmetrical head compared to the original that I was snipping and adjusting as I went that got slightly skewed from side to side. I made some adjustments to the pattern before cutting the foam to improve the shape of the "skull" and snout. I also shaved off a little of the hanging jowls to make the lower jaw and speech movements more visible. I considered doing away with the neck, as suggested, but really like the shape of the face at the corners of the mouth and cannot figure how to preserve that without it. To create that little cheeky bulge there evenly on both sides, I traced my thumb onto the foam cut for the sides of the head and filled it with contact cement(the shape that looks like Bart Simpson's smile). Once it cured, pinched it together from the inside so that the upper and lower marker line of the thumb outline came together. I am still trying to decide how to connect the jaw.
This time I used the Dap Weldwood contact cement and, apart from the fumes, really prefer it to the hot glue - neater, softer seams. Luckily, I have a separate room I can use for all the gluing.
I hope that the bumps on the edges of his jowls will be hidden by the fleece with the help of gravity, as you reminded me can help Shawn. Once I cover the nose piece and the snout/head with fleece, should I glue them together or stitch it fast? I like the idea of filling the skull with foam above the mouth piece.
Is there a standard body length or a recommendation for head to body ratio? I have found perfect fabrics for his suit and look forward to designing the costume.
Has anyone used taxidermy eyes and have a good source or any tips?
Re: an ill fitting jaw Posted by Shawn on Nov 18, 2014
Stitch the nose on. At least that would be my choice.  I really try to avoid gluing things on when I can. I just think you get a neater seam and tighter fit.
Re: an ill fitting jaw Posted by Shawn on Nov 18, 2014
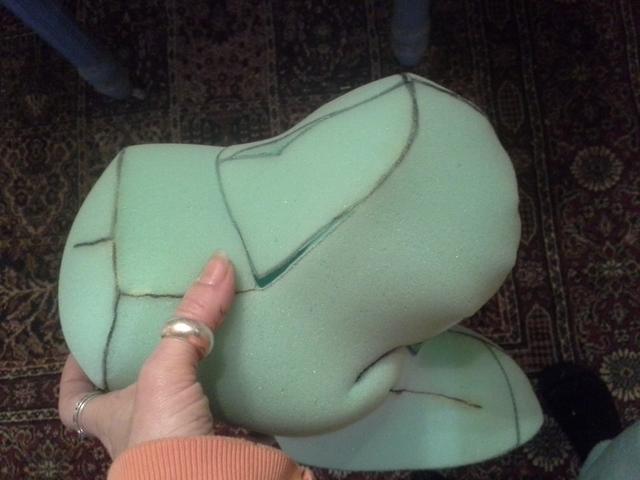
That little cheeky bulge is pretty common in mouth puppets. Normally it is not glued in though as you have done it. It is created when you actually close the mouth of the puppet. Let's see if I can explain this. If instead you would have simply cut that section of foam out (it would need to come to more of a point instead of rounded off) Then created your mouth plate that would be glued into those, when you closed the puppets mouth it would make that dimple. This also gives you that automatic mouth open position we have been talking about. I know I am not explaining this very well. I think you can maybe still do this. Can you give me a shot of the inside of the mouth where you glued it? I assume you have a bit of a dart in there now. You should be able to cut this so it opens back up.
Also there are some creative things you can do when you glue foam seams. This one is going to be really hard for me to explain but I'll try. You have about three options when you glue in the mouth plate to the inside of the head, to the bottom edge of the head foam or butt the ends of each so when glued in it rounds things out. Ok that is really confusing... Let me see if maybe I can grab some foam so I can take some quick picks to illustrate this. Ultimately this can give you three different looks in the final puppet.
Also there are some creative things you can do when you glue foam seams. This one is going to be really hard for me to explain but I'll try. You have about three options when you glue in the mouth plate to the inside of the head, to the bottom edge of the head foam or butt the ends of each so when glued in it rounds things out. Ok that is really confusing... Let me see if maybe I can grab some foam so I can take some quick picks to illustrate this. Ultimately this can give you three different looks in the final puppet.
Re: an ill fitting jaw Posted by Shawn on Nov 18, 2014
I did a quick and dirty video to try and explain what I was talking about above. At the moment it is still processing so is not available but hopefully by the time you check this thread again it will be live. It may just create more questions for you but that is good! Ask away!
Re: an ill fitting jaw Posted by mkshatto on Nov 18, 2014
That was so helpful, Shawn, thank you! I have made various sculptures before. Prototypes for a toy company, for one. My sewing experience has given me a good idea where to place a dart to create the desired form, but I have been stumbling on the moving parts. Watching this video makes it seem a no brainer! I am such a visual learner :P
There is a dart, so to speak, inside the cheeks at each corner of the mouth that I think I can slice back open. I will double check my pattern for the mouth plate as you've demonstrated here and make any adjustments to the pieces of rubber I've cut. I did paste two layers of 1/8" black rubber together for both the top and bottom mouth plate and they feel quite heavy so I may cut new ones and try the single layer.
Here we go...
Re: an ill fitting jaw Posted by mkshatto on Nov 18, 2014
BTW Shawn, you probably should make that prototype mascot into a puppet. It's a great shape!
Re: an ill fitting jaw Posted by mkshatto on Nov 18, 2014
Posted by: Shawn Sorrell on Nov 18, 2014
Can you give me a shot of the inside of the mouth where you glued it? I assume you have a bit of a dart in there now. You should be able to cut this so it opens back up.
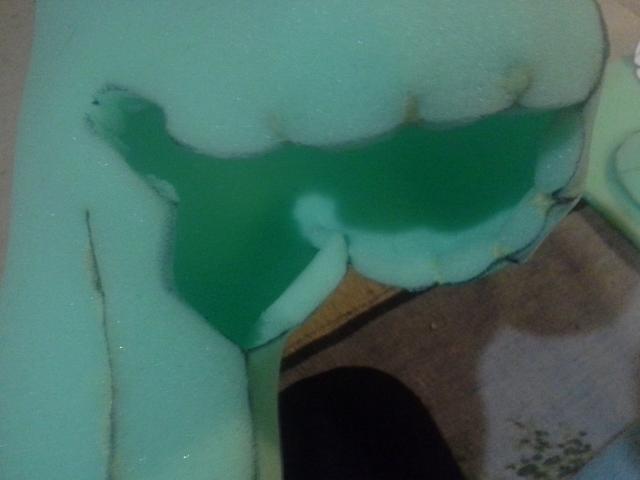
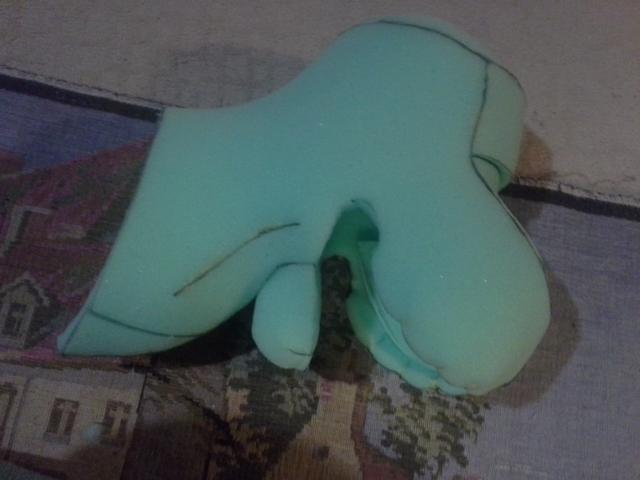
I went ahead and cut that glued dart out, but in the rounded shape so that the bottom mouth plate rubber can actually curve up and around the corners of the mouth mimicking the dark "lip" of a dog. I think this will work. I have gone back to a single layer of rubber so it is very flexible. The top mouth plate will fit inside the jowls and I plan to make a little row of top teeth that will show a bit just under his nose. I am pleased with the openness of the mouth but wonder if I may still need to eliminate more neck...
I can't wait to put it all together and see how expressive he is but I must get the fleece put on first so I've started my pattern using the pinning method. Tomorrow this puppet is the only thing on my calendar!
Re: an ill fitting jaw Posted by Shawn on Nov 19, 2014
Yea I think you want to cut that neck off. Sorry. Notice how my prototype had no neck at all? While that may have been for a costume puppet I still do the same for a hand in mouth puppet. The shape you now have on the neck should be created with the body part of the puppet and then the "neck" is simply a tube of fabric between the head and body. You do this so that you have the most movement you can get of the head up, down and side to side. Many puppet builders actually extend that neck tube all the way to the bottom of the puppet and tack it in there. That allows for the most twist side to side of the fabric and thus the head. Also makes it easy to slide the puppet on. I've seen puppets that have a piece of flexible tubing (think hoop skirt) inserted into the bottom of the neck tube. It can then either pop into the body neck opening and either go all the way down or be just below the opening at the top of the body. This allows for a detachable head and you can have multiple bodies with costumes on them for the puppet. Avenue Q (official version) uses a similar method so they can do quick changes of costumes in their show.
Re: an ill fitting jaw Posted by Shawn on Nov 19, 2014
P.S. You may not want to actually simply cut the neck off. The best option would be to dart and re-construct the foam that is there so you end up with a whole like you see in my prototype.
Re: an ill fitting jaw Posted by mkshatto on Nov 20, 2014
Removable head with various costumed bodies is brilliant!! I will definitely do that.
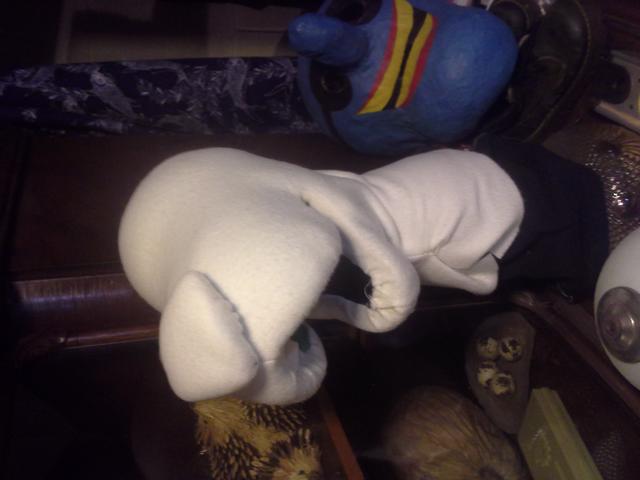
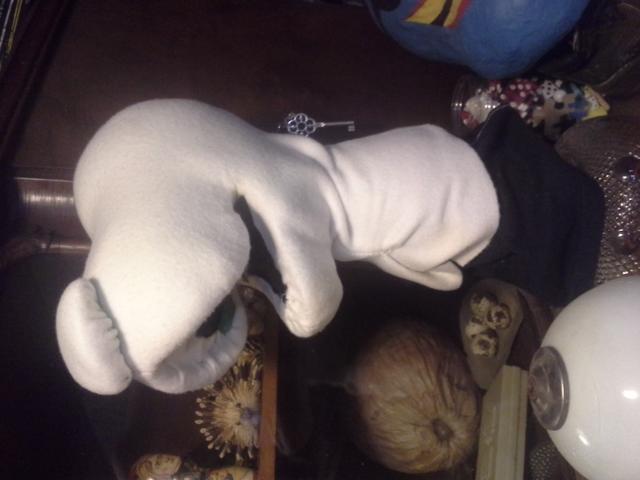
I've cut down & reshaped the neck/neck hole, added a tube of T-shirt fabric which is glued to the mouth plate inside and, in this case, seems sufficient for the finger tubes as well. I glued foam reinforcements inside the head and chin to preserve the form after stretching the fleece skin over it. I had to work at getting the fleece to lay relatively smoothly around the mouth, had to reshape and re-sew the gusset on the back of the skull. I hope that I can cover all the little gathers on the lips with whatever decoration I put in the mouth - probably black dog lips and pink tongue.
The nose is just pinned on for now but I will hand sew it fast to the snout once everything is colored. I read in a post, possibly an old one, about tinting fleece with chalk. I assume chalk pastels. Has anyone done this and have any tips or warnings? I figure it will not yield saturated hues but that is probably fine for this fella. If, however, that flops, I will try to use acrylic paints, diluted and pounced on with a stenciling brush. I'm a little afraid of this step because I don't want to end up with a plastic coating look...
The single piece rubber gasket mouth plate, curled up from bottom jaw to top, provides a wonderful springy action for making him talk. Perhaps this will degrade and crack eventually, so I'm counting on the fabric I use for decorating the mouth and the compression of the foam inside the fleece to remain workable.
Sewing on the eyes should create a little more definition between snout and brow by holding down the fleece. The neck looks a bit messy with all the wrinkles in the photos, but that will not be visible once he's dressed.
I have some nice wool plaid and herringbone fabric I may use for clothing. I'm also considering a pinstripe for his waistcoat, and a brightly colored and/or patterned ascot, but I am concerned about causing visual noise, for lack of a better term, when making videos. Again, if anyone has any tips or warnings, I thank you whole heartedly in advance.
Loading
No More Post
Error
Loading